Wednesday, August 24, 2011

The Beginner's Essential Sewing Kit!

People often ask which sewing materials they should keep around, so we decided to blog a list of things we love to use when sewing! Here are our recommendations for the essential sewer's kit! (Great for all sewers, but super helpful for beginners especially)


A Beginner's Essential Sewing Kit Materials and Tools:
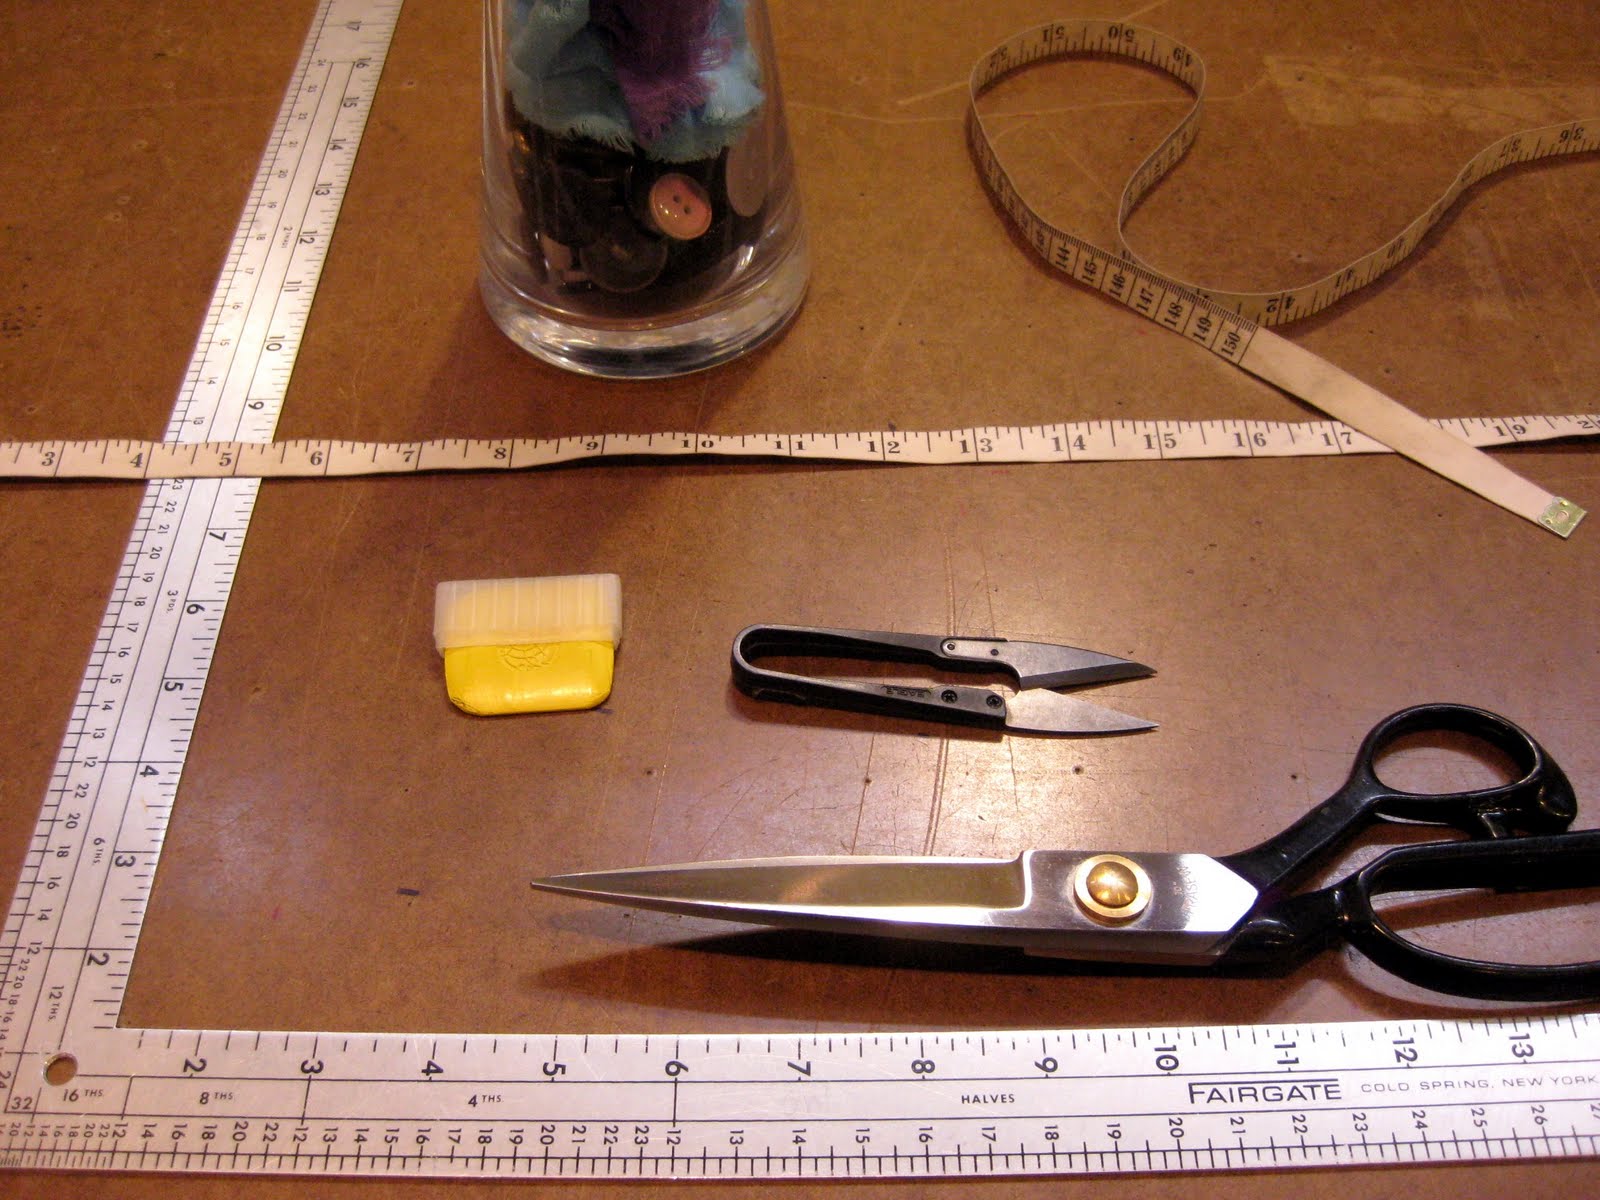
  • Fabric Shears: Pick one with a long, sharp blade and be sure to never use them on paper!
  • Quilting Ruler: Having both sizes is really handy but just one is good to start with.
  • Mini Scissors: Really great to keep around when sewing to snip off loose threads, cutting thread, snipping notch marks. Highly recommended. (We own several pairs of these!)
  • Tailors Chalk: Available in a variety of colours, pick some that will be easy to see against the fabrics that you're using.
  • Pins: Essential for keeping your fabric together when sewing or cutting.
  • Handsewing Needle: Very helpful for quick, minor alterations. Essential for sewing buttons. Great to keep around for other small projects and detail work.
  • Stitch Ripper: Removes any sewing mistakes quickly, perfect for beginners.
  • Measuring Tape: Works great for measuring larger projects and body measurements.
  • Thread: Black and white thread are good basic colours to have. Also keep another spool that would match with most fabrics you use or just one of your favourite colours. (We like dark blues, but greys are also easy to match)


These materials can all be found at your local fabric store. As well, if you sign up for a class at SWFDS, you'll also get this kit in a cute storage pouch! (thread and shears not included) 
Check it out here. Beginner, intermediate, and advanced classes available.

Hope this helps and happy sewing!
FashionDIY Artist signing out :)

Wednesday, August 17, 2011

[DIY Tutorial] Upcycled T-Shirt Stash Bag

Here's our simple tutorial on how to "upcycle" an old t-shirt into a stash bag!
We've stuffed ours with extra thread spools!


Materials needed:
Sewing machine
Serger (optional)

Old t-shirt
Ribbon or drawstring
Ruler
Chalk
Pins
Fabric Shears
Medium/Large Safety Pin
Iron (not pictured)


Instructions:
1. Lay t-shirt flat on table, measure and chalk out a rectangular box 10" wide x 13" tall.


2. Pin around the edges (to keep the back and front of the t-shirt together) and cut the rectangle out.


3. Place good sides together and chalk out 1/2" seam allowance from the left, bottom, and right sides. Leave a 2" space at the top on the right side. (This is where the drawstring goes so we dont want to sew it closed!)


4. Pin pieces together and sew on the chalked line. Make sure the good sides are together.


*IMPORTANT: To keep the corners sturdier from however much weight you keep in your stash bag, change the stitch length when sewing the corners. About one inch away from the corner, change the stitch length to 1.5. When you reach the corner, pivot the fabric with needle in, continue sewing at 1.5 for another inch then change the stitch length back to 2.5. Do this to both bottom corners.
Click on photo to enlarge
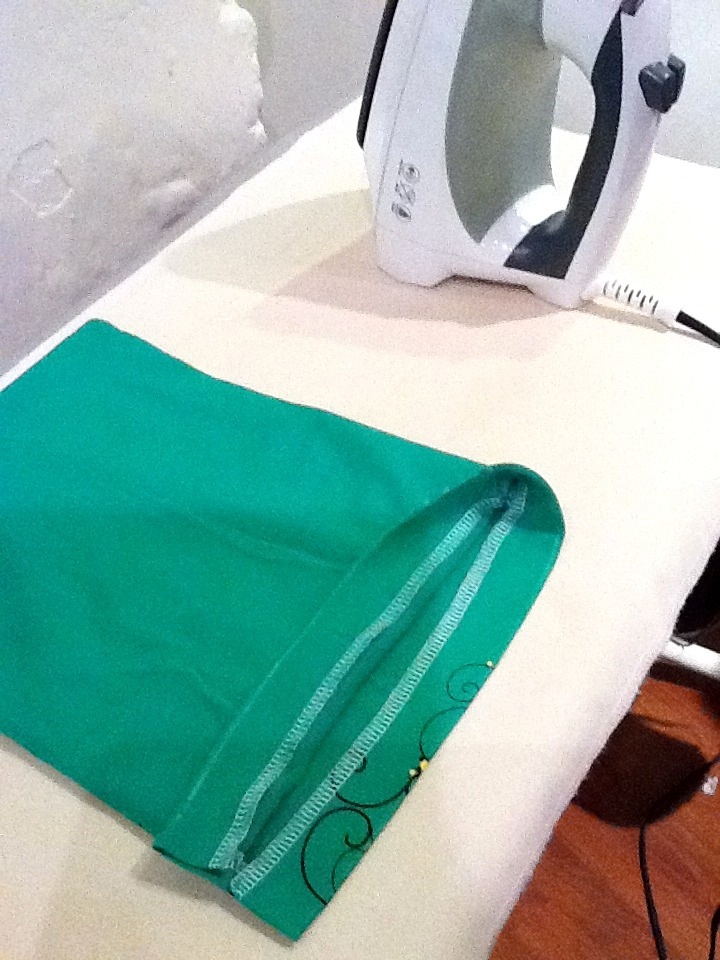
5. After sewing the sides and bottom, iron the side seams at the top flat.


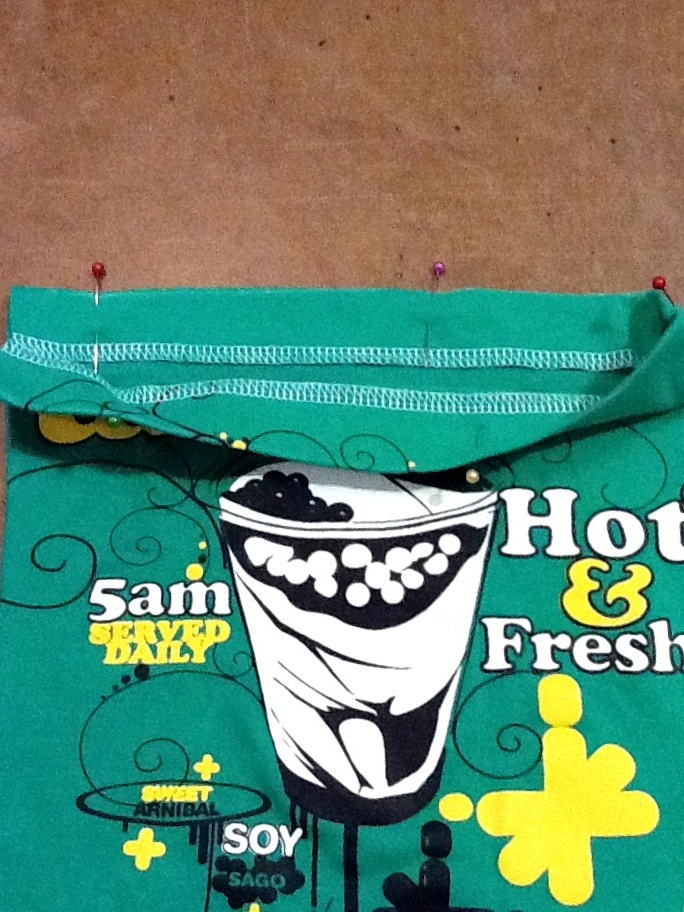
6. Mark 1" from the top on the front and back of the good sides.


7. Fold in the top at the chalk line and iron flat all around.


8. Pin the 1" part down and sew around the bag at around 5/8". We are creating the casing for the drawstring.


9. After sewing all around, attach the safety pin to one end of your ribbon/drawstring and put it through the top casing that we have just created. Feed the safety pin through until it comes out the other end.


10. Pull the two ends together, knot them and you're done!


Hope you enjoyed that tutorial and enjoy your new upcycled stash bag!
Let us know what you put in yours, we're storing thread spools in ours :D
Comments and questions are welcome too.

Till next time,
Happy Sewing!

FashionDIY Artist

Wednesday, August 10, 2011

[DIY Tutorial] Upcycled Frayed Jean Shortshorts

In this tutorial, you'll learn how to create your own pair of jean shortshorts the easy and inexpensive way! Recycle those jeans you dont wear anymore and turn them into a cute pair of frayed summer shorts!


Materials needed:
Sewing Machine
Pair of old jeans
Fabric shears
Ruler
Chalk

For distressing: (optional)
Sandpaper
Butter knife
Scissors

Instructions:

1.Lay the jeans flat. Measure 9" from the waistband and chalk it. Measure 3" from the crotch. (Use your own measurements depending on how long you want the shorts, but make sure both sides are the same!)


2. Chalk a line connecting the two chalk markings. It's not necessary to do it on the back.


3. Make sure the jeans are flat and cut. No need to be neat at all, messier edges work better for fraying.


4. Start fraying! Use your fingers to pull out horizontal threads from the raw edges. Don't be too gentle or you wont be able to get the threads out. Throw them in the dryer to fray them even more!


5. Once frayed to your liking, sew a straight line around to prevent further fraying. Sew where the highest part of the fraying stops, (ours was about 1.5" from the edge)


6. You're done! If you want to distress your new shortshorts, grab some sandpaper and other creative tools like knives, scissors and experiment! Tip: Try sponging a small amount of bleach lightly on the fabric to create a worn out look.

To get this distressed look, grab some sandpaper and press and rub it quickly, left to right until the fabric starts shredding. 
Enjoy your new frayed shorts and keep updated for our next tutorial!
Till next time, happy sewing! :)

- FashionDIY Artist

Saturday, August 6, 2011

[How To] Pick Thread Colour for a Sewing Project


Important steps to know:

  • At the fabric store, get your fabric cut first and then pick your thread.
  • Pull a bit of the thread out the from the spool and lay it on your fabric so you can see how it will look it.
  • For solid fabrics: pick a thread colour that either matches it exactly or one shade darker. *Darker shades of thread blends easily to match your fabric*
Thread colour matches fabric exactly. Thanks to Davie & Chiyo for letting us use their clutch as an example! Check them out here!
  • For printed/patterned fabrics: pick a thread that either matches the base colour or one of the darker shades in the print.

We chose dark grey thread to match with the darkest shade in the print.

Did you see our cute new promo cards peeking out in the pictures?
We've been working on lots of beautification changes and little upgrades so keep updated!
Be sure to check back next week for an upcoming tutorial!

Until then, this is your FashionDIY Artist signing off~
Happy Sewing :)

Friday, July 29, 2011

[DIY Tutorial] Baby Receiving Blanket

Here are our DIY baby receiving blankets! Follow our tutorial to learn how to make this simple and inexpensive project!


Materials needed:
1.1 Metres of fabric (100% cotton in flannel or cuddle)

Sewing supplies needed:
Serger sewing machine (not pictured)
Fabric shears
Ruler
Measuring tape
Chalk
Circle reference (a mug or cup will work)


Instructions:
1. Decide what dimensions you'd like for your finished receiving blanket.
These instructions are for a 40" x 40" oversized blanket.

2. Lay fabric flat on the table.


3. Use a measuring tape to a 40" x 40" square (or whatever dimensions you've chosen). Chalk out your line and cut.


4. Take a mug or any circular object and line it up to the corner edges of the fabric.
Chalk the new rounded edge to all four corners.


5. Starting on a side not a corner, serge all the way around the blanket.


6. Trim off any excess threads from the serger and you're done!


For any questions, don't hesitate to drop us a comment below, send us an email or just visit us in studio! 
Happy sewing!

Monday, July 25, 2011

July's Throw Pillow Workshop Recap

Check out yesterday's throw pillow workshops!

11 students in a variety of sewing levels (from beginners to sewing experts) participated in our one day workshop, with 2 sessions offered. It took less than 2 hours to sew both pillow covers!

2 envelope throw pillow covers made from silk
(left to right: Michelle, Sasha, and Sheila with their pillow covers)
Tai sewing her second pillow cover
Sasha working on her pillow cover
Michelle showing off her completed pillow covers!

If you missed out, no worries! Our August workshop is coming up soon, details to be released very soon, so be sure check our website and Facebook for updates!

Thursday, July 21, 2011

[DIY Tutorial] Safety Pin Shirt

Here is our DIY Destroyed Safety Pin Shirt, inspired by Balmain from their Spring/Summer 2011 Collection. Learn how to make it yourself without paying the $2570 price tag!


Materials needed:

Plain black shirt (any style)
Safety pins in a variety of sizes 
Fabric shears
Chalk

Instructions:
1. Use the chalk to mark where you will cut. Experiment with straight lines, diagonals, curves, longer, shorter lines.


2. Cut on the chalked lines. No need to be extremely precise; jagged cuts add an edgier feel.


3. Start pinning! Smaller safety pins will keep the fabric closer together, larger ones will let the fabric move more.. and show more skin. Experiment with various sized safety pins to get a different look each time. Try spacing them out or pinning in different directions.


Here's the final look! 


Celeb Inspiration:


Korean girl group, 2NE1, also recently sported many of Balmain's safety pin pieces from their Summer/Spring 2011 Collection in their music video "Lonely".

CL in the Safety Pin Destroyed Shirt and Leather Safety Pin Jackets


Minzy, CL, Sandara, Park Bom in White Leather Safety Pin Jackets. Other pieces from Balmain's Spring/Summer Collection as well.


Photos & Credits to:
Eiffel in Seoul

Black Vneck from Forever 21
Safety pins from Dressew