Showing posts with label diy. Show all posts

Wednesday, February 22, 2012

[DIY Tutorial] High Waisted Skirt

Spring is almost here and the perfect piece to ease out of winter is.. skirts! Wear with fun tights or dress it up with heels. Follow these simples steps to make your own!


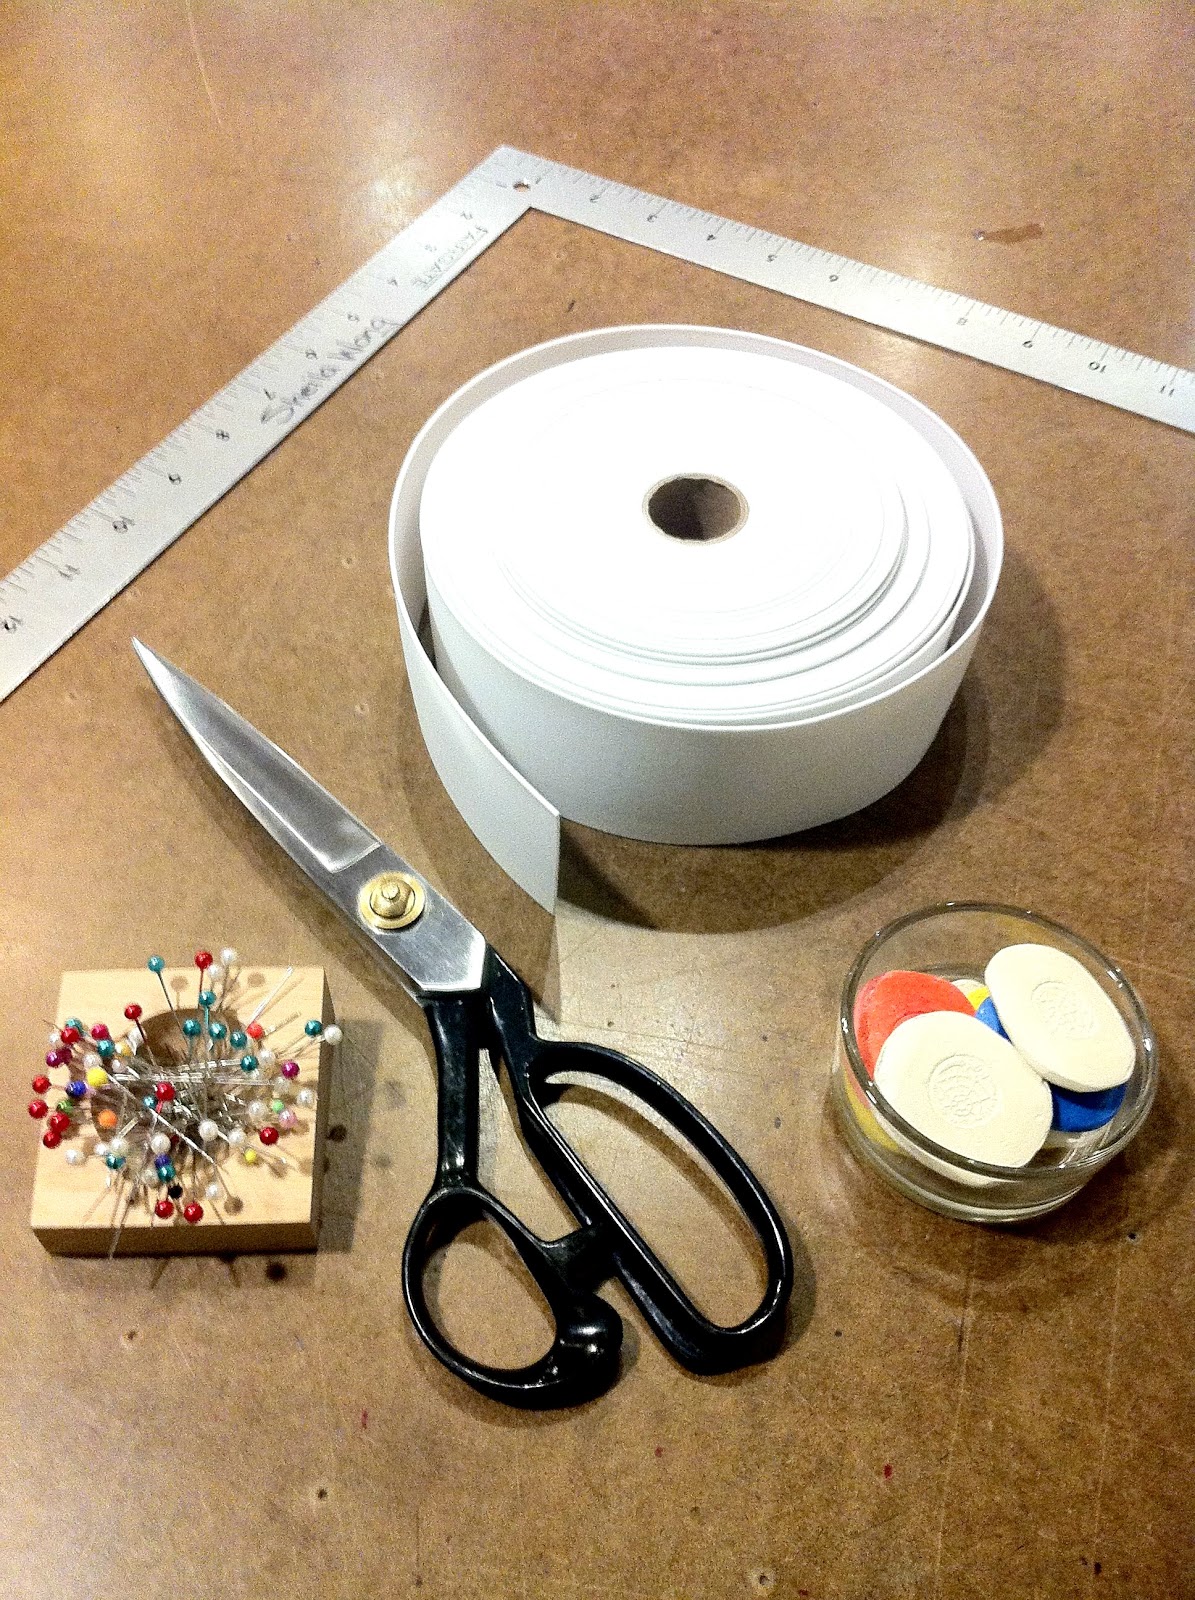
Materials Needed:
0.5 - 2m of stretch fabric (Polyester/Spandex blends are optimal, amount varies depending on length of your skirt)
0.75 - 0.9m of 2" width elastic
Sewing machine (not pictured)
Iron and iron board (not pictured)
Fabric shears
Quilting ruler
L Ruler (optional)
Pins
Chalk
Safety Pin (not pictured)

Instructions:
1. Lay the fabric flat good sides together.

2. For our measurements, we created a square 21 1/2" by 21 1/2", but extend these measurements to fit a longer skirt. (21 1/2" by 27 1/2") Chalk the box, and cut it out. Please note these measurements fits a 25-27" waist.


3. Place the two pieces good sides together, and pin the side seams. Sew at 1/2" seam allowance down both sides, and backstitch.


4. Press seams open if needed.


5. Fold in the waist by 3" so the top should be bad sides facing each other. Pin and sew at 2.5" all the way around, leaving a 3" opening for the elastic. Backstitch at the start and end points.


6. Measure around your waist or where you want the skirt to sit. Subtract 1" from the measurement and cut the elastic to that length.

7. Attach a safety pin to the elastic and use it to feed the elastic through the opening. Make sure it is laying flat all around.

8. Sew the elastic together at 1/2" from the raw edges. Push it into the casing area.


9. Top stitch the elastic in, closing the 3" opening. Remember to backstitch.


10. Fold the hem in at 1", so that bad sides face each other. Topstitch all the way around at 3/4", starting at a side seam.


Tada! A fabulous fashion statement in ten steps!
Hope you all enjoy wearing your new high waisted skirts, share with us the outfit :)


Until next time, happy sewing,
FashionDIY Artista!

Wednesday, January 11, 2012

[DIY Tutorial] Infinity Scarf!

We are back with another tutorial! One of our most popular classes for you to make on your own at home.. the infinity scarf! VERY simple and easy to make and wear!


Materials needed:
0.8 metres of jersey stretch fabric
Matching thread
Quilting ruler
Chalk
Fabric Shears
Iron & Iron board
Sewing machine


Instructions:
1) Lie the fabric flat on the table, folded in half with good sides together and salvaged edge closest to you.


2) Trim the two raw ends so that they are parallel. (Not the salvaged edge)

3) On one of the salvaged corners of the fabric, use chalk to mark four inches up. Use the ruler, and chalk a line descending to the other salvaged corner. This is to create a nice cascading final look for the scarf. (Click to enlarge)


4) Sew the fabric good sides together on the chalked line, then trim excess neatly.


5) Press seams open.


6) Stretch the tube to give it shape, flip it inside out and you're done!


How easy was that! Congrats on a fabulous new scarf. Psst- share what you wear with yours!

Cheers,
FashionDIY Artista

Tuesday, January 3, 2012

SWFDS 2011: A Year in Review

Hello lovelies! It's a new year, its 2012! To celebrate, we will be recapping our best moments and greatest highlights from 2011. Happy New Year to you all and best wishes.


PS- This post is very link friendly. Clicks will take you directly to the post to read more about it (and check out the pics).


Let's start with January 2011 and run through the year chronologically
We started off the year with the last few days of our UNDER 100 Exhibit, pieces done by local artists all within the 100 price range. Our walls were beautifully decorated even with people dropping in and out to pick out art! Sheila was also featured in Urban Snapshot, a local blog putting the spotlight on Vancouver. Have you read it yet? 


Sheila sewing with Joel of Urban Snapshot!


February kicked off with a round of new workshops- KEEP ME TOASTY, featuring an infinity scarf, hobo mitts and fuzzy earmuffs! This was the first of our monthly themed workshops and it kicked off many more fun projects through the year.


The infinity scarf- versatile and trendy! (Gorgeous peach colour no?)


In March, another round of workshops with VINTAGE DIY! We made bows, clutches and statement necklaces all from gorgeous vintage pieces. Sheila was featured on Blanche Macdonald with a wicked article about her career after graduation! Read it!


La la love this fabric! We fancied up the clutch with a leather drawstring!


We made high waisted skirts and belted capes in April's SPRING FLING workshops. (The high waisted skirts were SO popular, we made them again in May!) We also welcomed our first in house designers, Davie & Chiyo Custom Clutches!


Stunning belted cape; this one was specially made for a bride!


May was bridal month in studio. We made gorgeous wristlet clutches and beaded headpieces in our SOMETHING MADE SOMETHING BLUE workshops! We attended EP!C 2010, and offered classes to make a clutch, an eco stash bag, and rosebud hair clips! We also featured a few local designers in our booth- Davie & Chiyo, Andrew Briggs, Nate Organics, and Picasso Designs. Did you miss it? 


Pearl and ribbon headpiece.. So beautiful! (Thanks Alisa for the pic!)


Is this rosebud not insanely adorable or what?!


We were feeling fun kiddy prints and June featured URBAN BABY workshops, making ah-dorable stuffed owls and baby tutus. Cute eh? We also celebrated the one year anniversary of our grand opening!


The stuffed owl wearing the tutu :D


July was SLUMBER PARTY month, and we made cozy throw pillows! Our house designers, Davie & Chiyo held a trunk show in studio! We also kicked off the first of our DIY Tutorials on our blog.. Make yourself a Balmain inspired tee! As an official partner of One of a Kind 2011, we joined them on a yacht, teaching wearable flowers for their media preview!!


Making flowers on a yacht- there's a first for everything!
We packed several DIY tutorials into August with the baby receiving blanket, frayed jean short shorts, recycled t-shirt stash bag, and beginner sewing kit!


The basics of everything you need to start sewing!


In September, we offered zipper workshops! We started our Sewing Tips Series on Twitter. (We've got them compiled nicely with photos here!) More DIY tutorials on a personalized comfy sweater, and protective iPad/ebook case! We also introduced our DIY rack in studio; picking from a huge variety including past workshops we brought back!


Don't you just adore this springy flower print??


DIY tutorials in October included fun headbands and a simple makeup pouch! Sheila debuted her line of custom designs, Lylah V Flowers!


November was an exciting month for media highlights! We were featured in TV Week Magazine and Vitamin Daily.com! We held an exciting giveaway to celebrate our partnership with One of a Kind. Davie & Chiyo held another trunk show in studio, this time debuting another label, Lylah V Flowers!
Sheila in TV Week Magazine!


Lylah V at the Trunk Show!


Our second show at One of a Kind in December, this round we taught sewing classes in the Make Something Awesome Lounge! (Rad photos!) Read the recap if you missed out! We held a NYE giveaway with Davie & Chiyo, a lucky gal scored a gorgeous clutch! Sheila shared her fav dresses for new years!

Making flowers at OOAK!
Quick Facts:
We taught over 165 students in 12 months with approximately 60% being beginner sewers. 
On top of the 165, we taught 60 guests at the 2011 One of a Kind Show in 4 days. 
Oh and did we mention the part where we taught on a yacht?

There you have it ladies, and gents! SWFDS in 2011! 
Keep posted on our Facebook and Twitter as we zip through another year!
PS - We're having lots more classes coming this year, watch out!!
Happy 2012 and all the best :)

Cheers!
SWFDS Sewing Team

Saturday, October 29, 2011

[DIY Tutorial] Mini Make Up Pouch in 10 Steps or Less!

     In today's tutorial, we will be showing you how to make a mini make up pouch, complete with a cute button closure. It's simple and won't take you too long so keep reading to find out how to make your own!


     Another heads up, we will be teaching free on site workshops (similar to our tutorials) at the upcoming One of A Kind Show in Vancouver from December 8-11! More information on the show and where to buy tickets can be found here: http://oneofakindvancouver.com/index.php.

Materials Needed:
Sewing Machine (not pictured)
Iron (not pictured)
12" x 7" pieces in exterior fabric, lining, and fusible interfacing
Matching thread
Button of your choice
2" piece of elastic (1/4" width)


Instructions:

1. Attach the fusible interfacing to the bad side of the fabric using an iron. Be sure to use a fabric guard to protect your iron.


2. Place lining and exterior fabric good sides together, lining up the raw edges.


3. On one end of the fabric, chalk mark at the half way mark. Pin elastic at this mark with loop sandwiched between lining and exterior fabric with loop facing inside.


4. Chalk all four corners with at half an inch. This will make it easier to sew around the corners.


5. Pin all around to keep together when sewing. Be sure not to sew over pins!


6. Sew all around at half an inch seam allowance, pivoting at every corner with needle in. Remember to leave a 3" opening at the end without the elastic loop. Backstitch at the beginning and end.


7. Cut off bulk seam allowance as shown in picture. Now flip it inside out!


8. Press the rectangle flat.


9. Topstitch the open side at 1/8" seam allowance from the edge to close it. Backstitch to secure. Topstitch the side seams at 1/8" from the edge to create a pouch. Backstitch to secure.


10. Close the flap down and mark where the button should be placed. Hand sew button on the mark.


You're done! Your new makeup pouch should look something like this!


Hope you enjoyed this weeks tutorial!
This pouch is very versatile and would make a great gift as well :)

We will be teaching free workshops with similar projects at One of A Kind Show Vancouver from December 8-11! More info and purchase your tickets to the show here!

Have a lovely Halloween!

- FashionDIY Artista

Monday, October 3, 2011

[DIY Tutorial] Headbands!

Headbands are so multipurpose and can be styled in so many ways. They can be worn anytime and anywhere; exercise, studying, formal events, parties, and more. Add a flower for a girly touch, braid leather and suede for a boho look, or stud it for some rocker style! Follow this short and easy tutorial to make your own headband~


Materials needed:
Sewing machine
0.4m of elastic (width, elasticity, colour is up to you)
Matching thread
Fabric shears
Measuring tape
Pin


Instructions:

1. Take the measuring tape and wrap it around your head where you want the headband to sit. Use that measurement and cut the elastic to that length. (We used 22")

2. Fold the elastic in half, good sides together, pin the ends together about an inch from the edges.


3. Sew the ends together half an inch from the ends. The elastic should now look something like this, except the ends will not be curled since we are sewing them down in the next step.


4. Lay the elastic flat, bottom side up, flatten the two raw edges down and sew straight down both edges.


Tada, You have just made your own basic headband!
Add your own touch. Experiment with multiple elastics, try different thicknesses, add a flower, stud it; the possibilities are endless!

Here are some headbands we've experimented with..
For the braided look, make the braid first then attach them together with a smaller version of the headband you just made!


Till next time, Happy Sewing!

Enjoy your new headbands :)
- FashionDIY Artist